
SEAFARI App Tips & Tricks
Below is a summary of tips and tricks that will hopefully enhance the SEAFARI App user experience. They are based on feedback from users over the past year since the app's launch in April 2017.
Pin Placement
A) iOS Users (i.e. iPhone)
There are 2 main ways to post a sighting:
- With Location Services ON
This is probably the easiest way to mark a position if you log the sighting when at the same location as the animals that you are observing as the phone will place the location pin at your current location by default.
But… if you decide to report the sighting at a later stage (eg. when back at home after a boat based whale watching trip) the pin will be placed at your home because that will then be your current location. Therefor you will need to manually place the pin back at the location where you saw the animals… This is what many people forget and that is how many dolphins and whales suddenly find themselves in someone’s backyard in the middle of town.
Consequently the manual pin placement is still important to master. And this is not difficult if a couple of easy rules are kept in mind… I will walk you through a placement scenario:
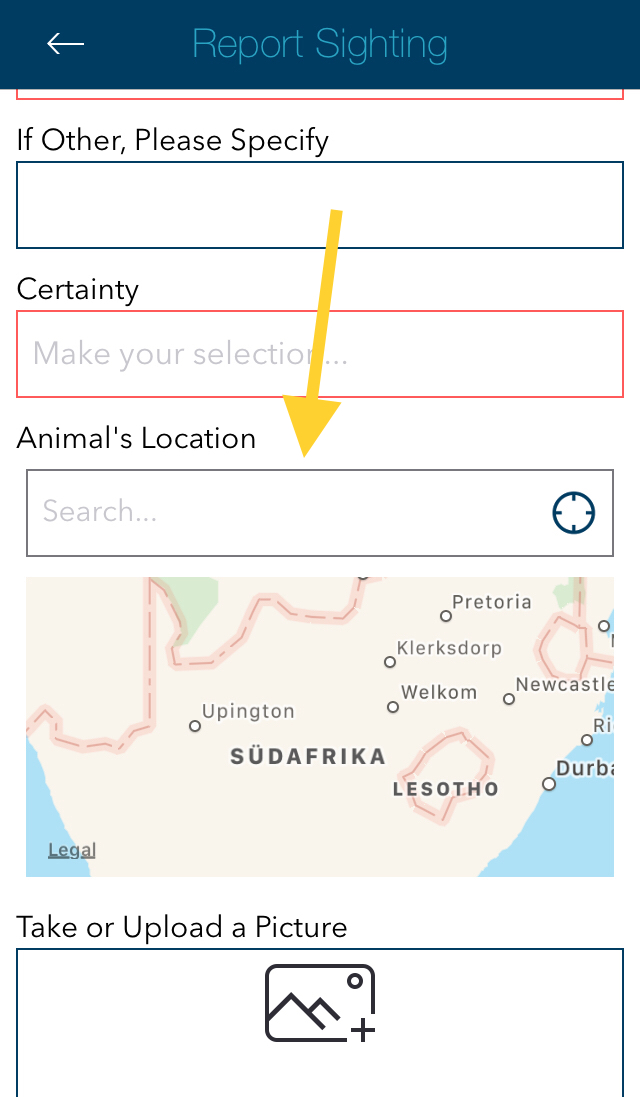
- Open app and fill in "Species" and "Certainty"
a) Map will have pin at my current current location (in my case the „somewhere“ is in Noordhoek) but because I saw an animal at Knysna Heads and want to place the pin there, I will have to move the pin
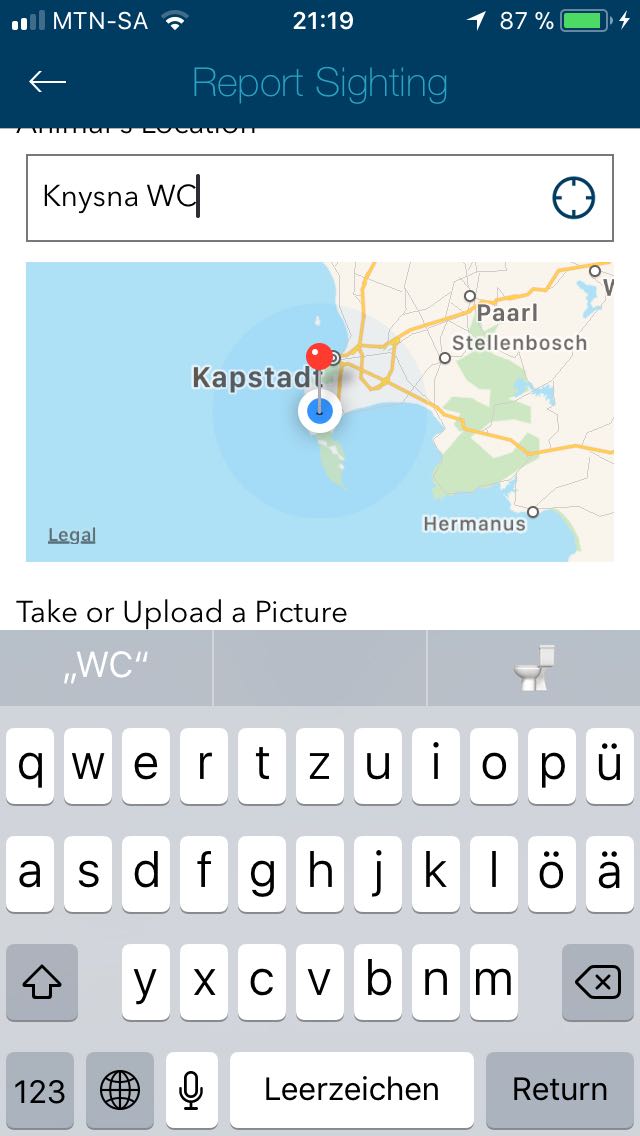
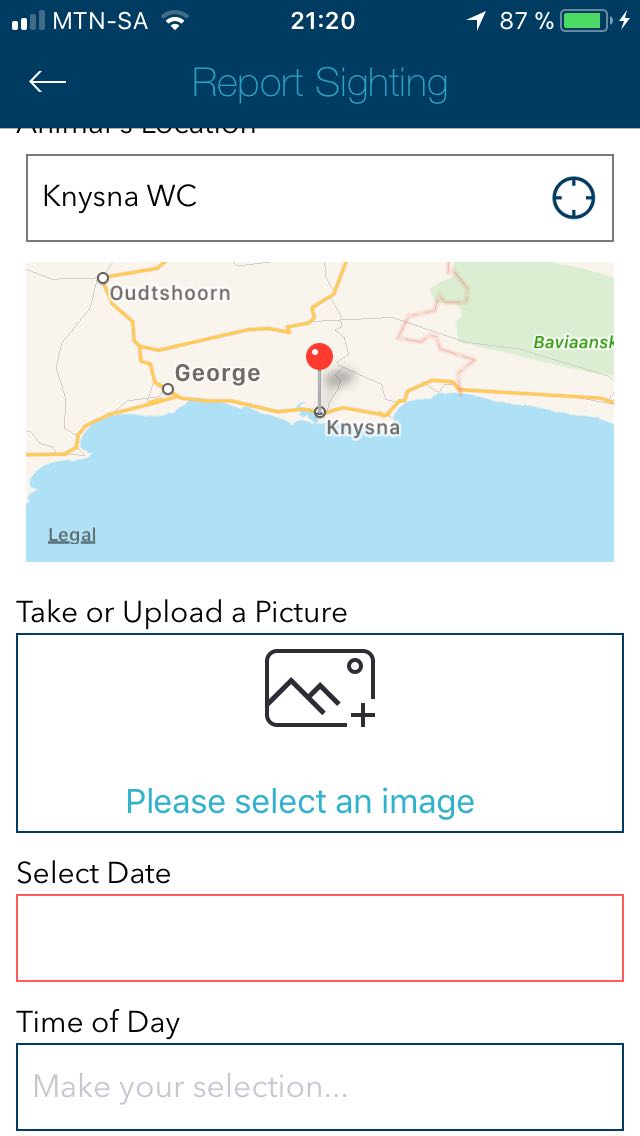
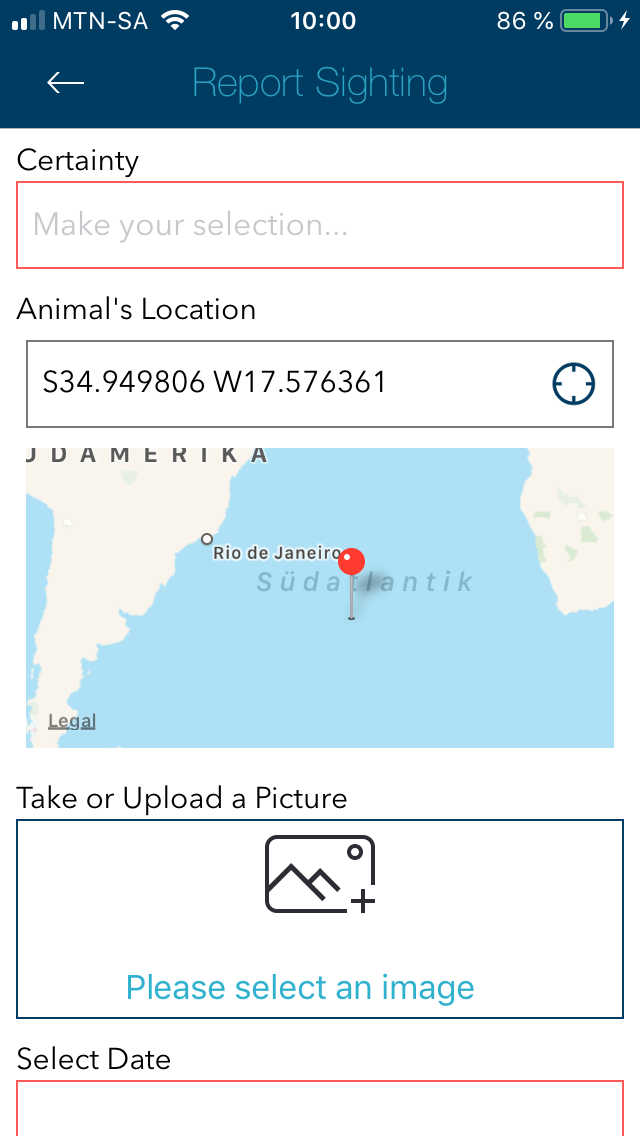
b) To get the pin in the right place I either move the map to where I can see the desired location (which can be a pain, especially if its waaaaay off screen), OR I can get close to the location by typing „Knysna WC“ in the entry field just above the map (which has „Search“ written in it). The „WC“ addition stands for „Western Cape“ and is done to ensure that you narrow down the possibilities. You can enter a street name or whatever (even Latitude and Longitude) in this field, its basically a Google Maps search. THEN tap RETURN on your phone pop-up keyboard. (in iOS it is quite easy to move the map to the desired position with just 1 finger, but in Android it is much more tedious..., but by using the „Search“ field one can reduce the amount of swiping significantly)
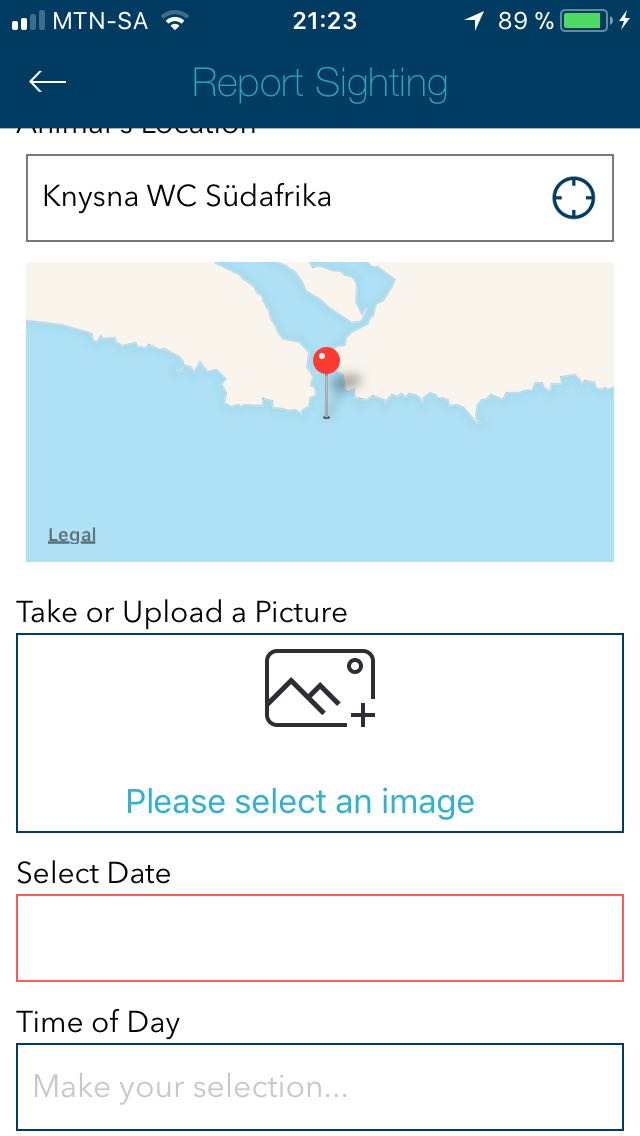
c) Now the pin has jumped to Knysna town centre…. To get closer to the desired location all you need to do is zoom in on the map by either using 2 fingers OR by just tapping in quick succession anywhere on the map and moving the map with a single finger from time to time, to realign it, until you have the map scale that you want and the desired area for pin placement.
d) place pin by pressing AND holding with a SINGLE FINGER in the map area where you want the pin to appear. The pin will appear after a few seconds. If it doesn’t then just lift the finger and press again… worst case you just have to hard close the app and open it again and follow the above steps again. This is not a Seafari issue but applies to all apps that use maps in this way.
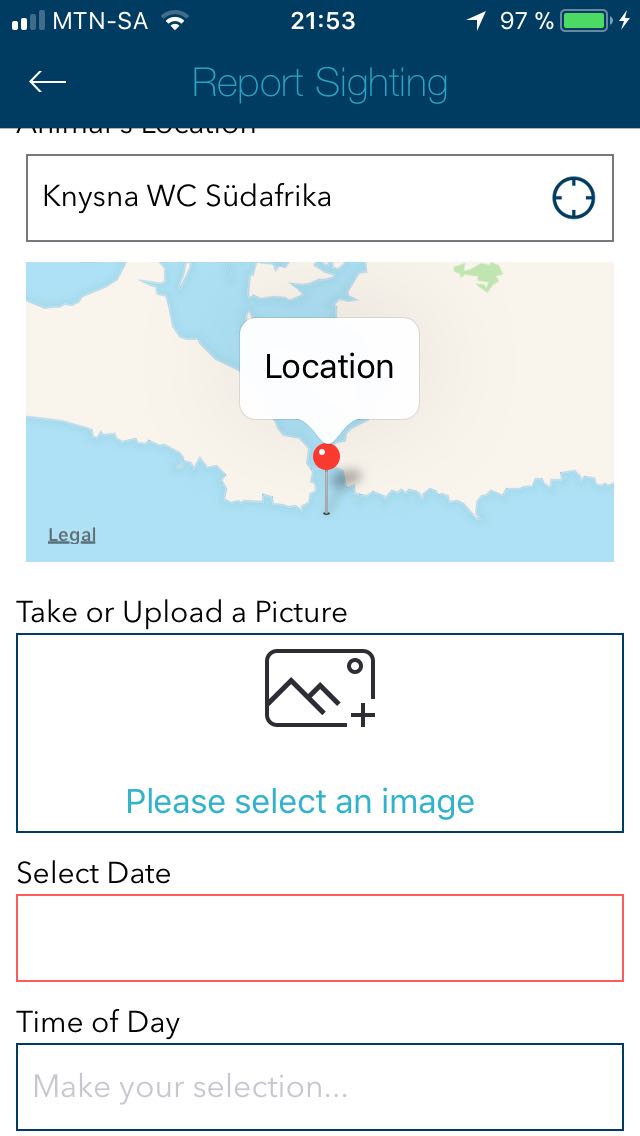
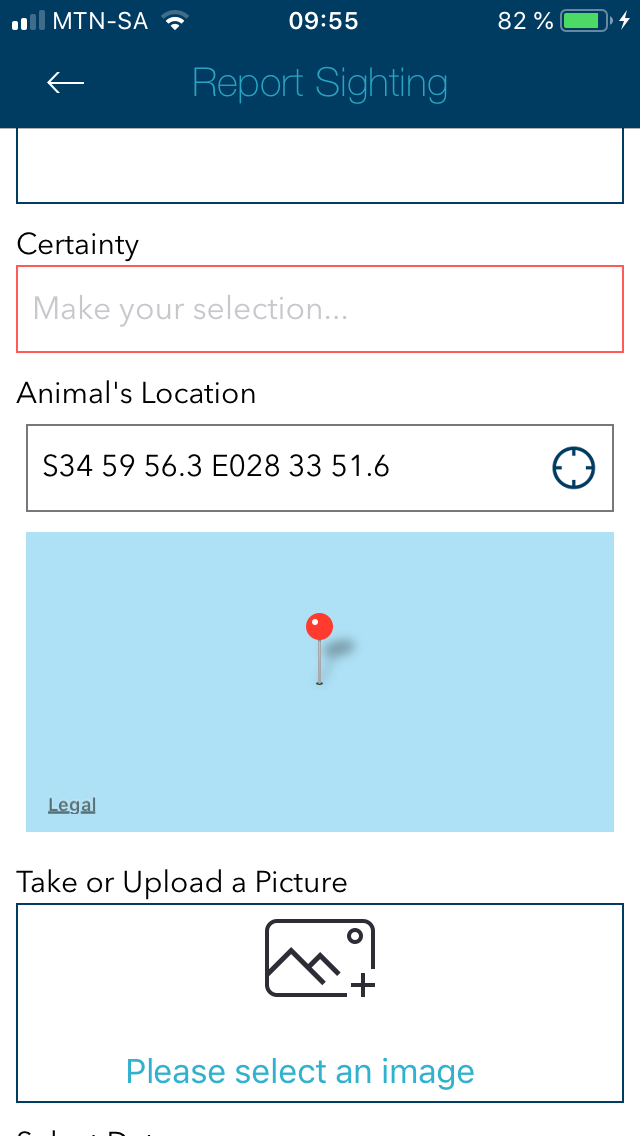
e) If happy with the pin position you can continue to complete all the data fields and then SUBMIT… However… if you want to fine-tune the pin position you can move it by either again tapping and holding somewhere else on the map to reposition the pin OR you can tap the pin until a „Location“ label appears above it and then hold the pin and move it around the screen and then drop it at the desired position.
- With Location Services OFF
Effectively the same as above except that NO pin is placed by default when you open up the „Report Sighting“ page in the app. You will have to follow the steps from „b“ onwards. What I suggest is that you scroll up and have a look at the pin position again just before submitting.
Another problem that happens is people keep the app open for a long time and then try to submit a sighting. That usually screws up the pin position as well if the position is not checked before submitting. It is recommended to hard close the app when not using it to ensure that it doesn’t get „confused“. Again, this is just normal app etiquette.
B) Android Users
Pretty much the same as above but with one big difference: Trying to move the map with one or two fingers placed on the map area does not work, eg. when the desired pin placement area is just off screen and the user wants to get that portion of the map into view in order to place the pin. The solution for this problem is the following:
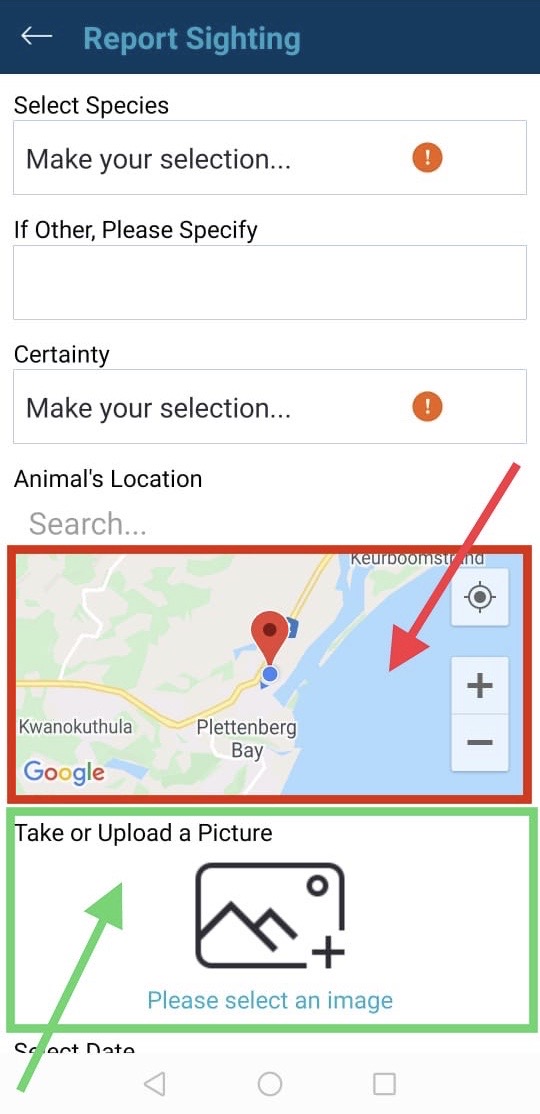
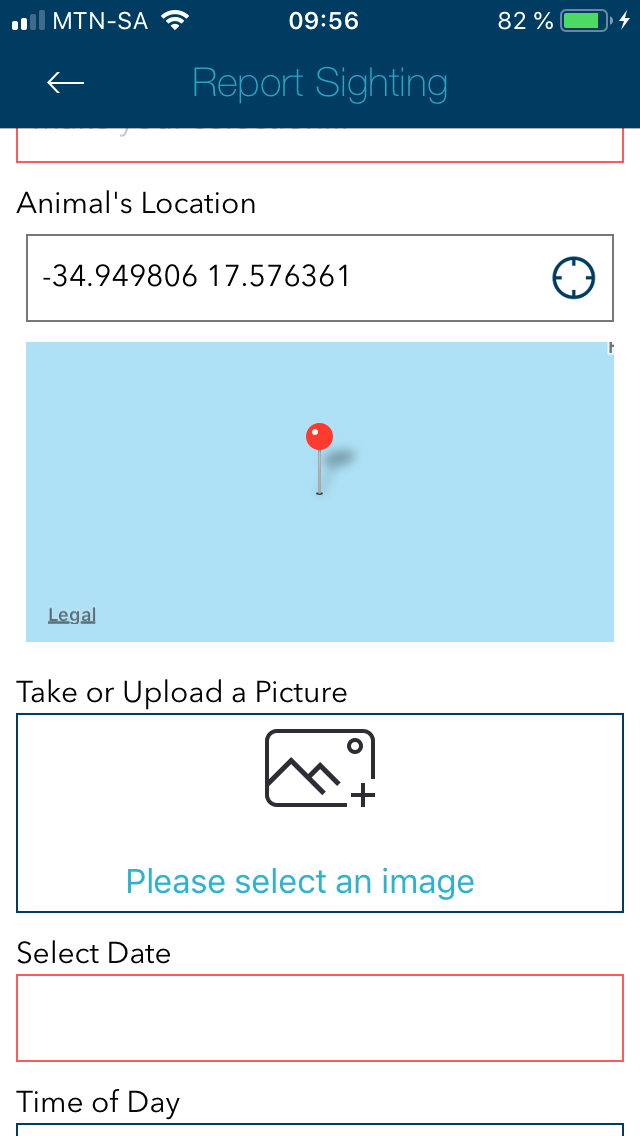
a) Place AND hold 1 finger on the phone screen IN THE "Take or Upload a Picture" BOX, i.e. the lower green box in the picture.
b) place a second finger ON the phone screen and IN the map area (red area on picture). Then move this finger up and down or sideways in order to get the map to move in the desired direction. Keep the „off map finger“ in position at all times when you are trying to move the map with the „map finger“. Press and hold the "map finger" at the desired location once this position has been located.
c) once the pin is in the correct position you can remove both fingers from the screen. At this time a dialog box from the "Take or Upload a Picture" box might appear. Just select the "Cancel" option and continue to complete the rest of the (optional) data fields.
My Sightings
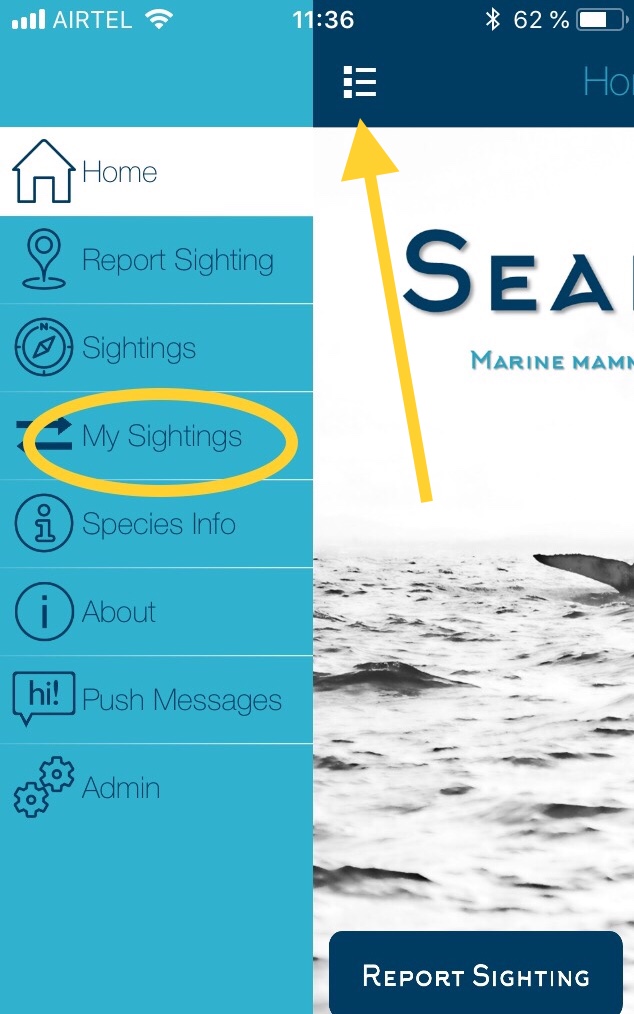
This is the best place where users can find a quick overview of their OWN sightings without having to scroll through all the other sightings reported by other users.
This menu item is accessed via the main menu on the left-hand side of the app. If on the the home screen the „main menu“ item (arrow) needs to be tapped first in order to open the main menu and get to „my sightings“ (yellow circle)
App Search function
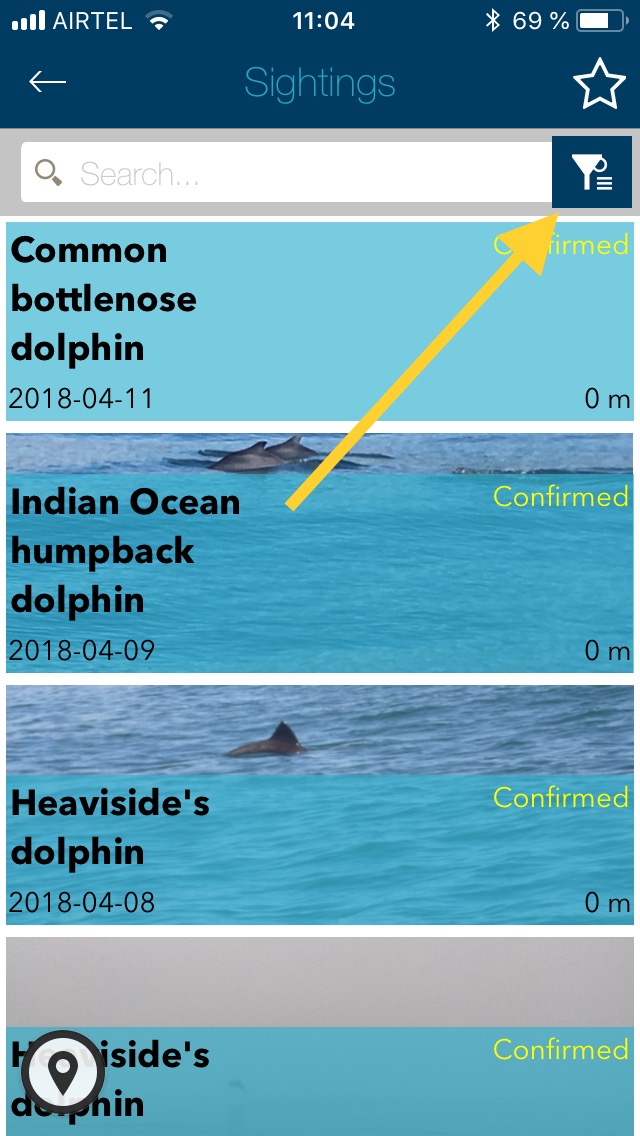
A somewhat hidden but very powerful feature found on the main „Sightings“ page. Searches can be done in 2 ways:
1.Species search
a) Tapping on the „funnel“ icon (yellow arrow in picture below) will open a dropdown menu that will list the common names of all species that have been reported via the app.
b) select 1 or more of the species that you want to see. This will place a „tick“ mark to the right of the applicable species
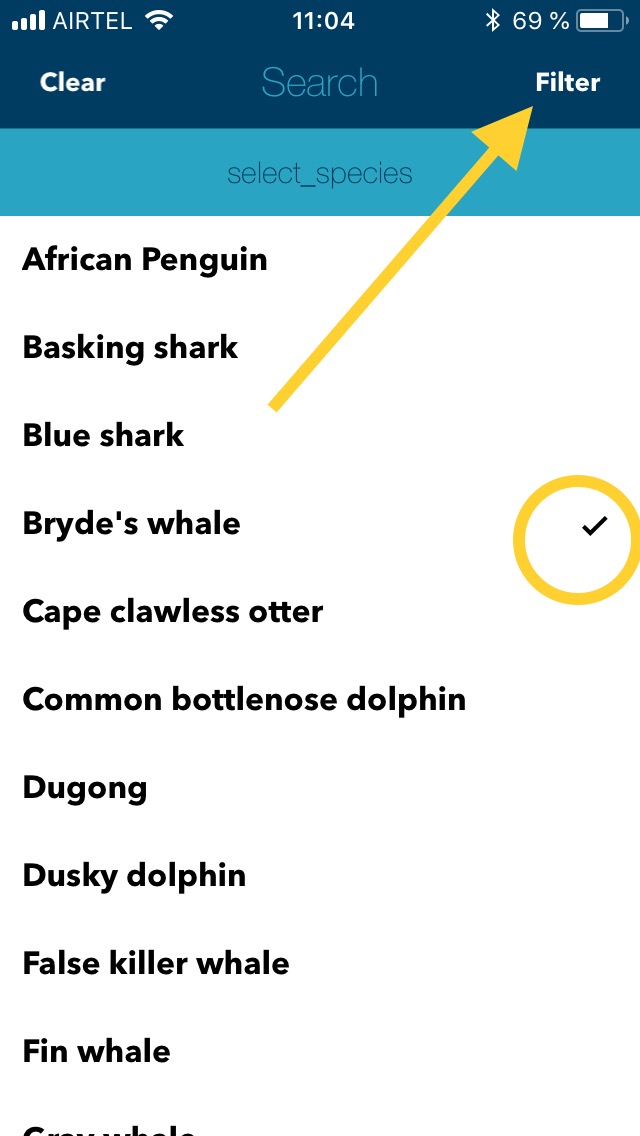
c) Once all desired species have the „tick“ mark next to them tap „Filter“ at the top right hand side of the screen and this will then filter out the unwanted species and show the desired species in either a list format OR on a map (depends on the format you were using when originally opening the „Sightings“ page)
d) Toggle between LIST or MAP view by tapping the applicable icon at the bottom left of the „Sightings“ page

2. General search
Use the „Search“ field (to the left of the funnel icon) to enter any term that could be of interest to you. This will NOT search for a specific species but will search for a match within the „Additional Information“ field of each sighting. If a user has omitted to add any additional information when reporting a sighting then that sighting will never appear when using this search method.
Some advanced techniques for Pin placement
----------------------------------------
ALL feedback is always welcome!